Angel Food Cake

Comment

Angel Food Cake

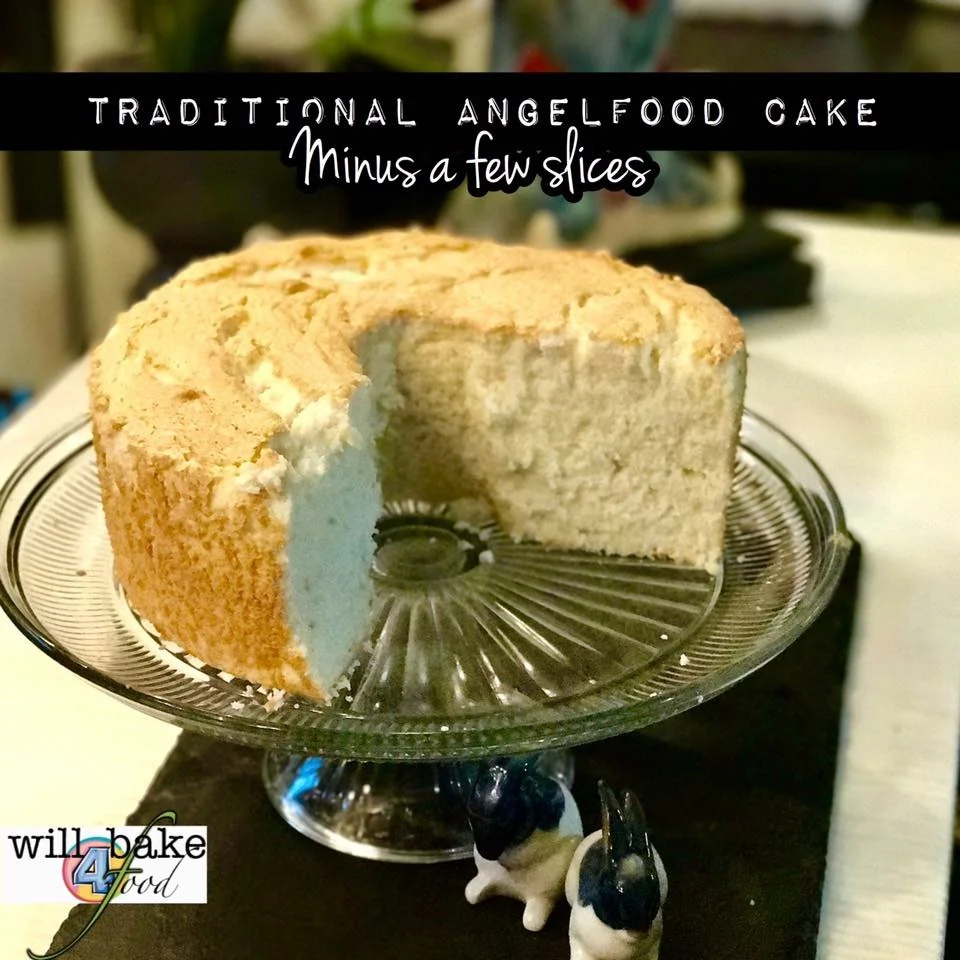
Have you ever been in a grocery store and in the bakery there are a ton of “angel food” cakes? They’re really not that hard to make and with a few tips, here’s a no fail way to succeed at making one from scratch!

Ingredients:

DRY mixture:

1/2 C Granulated Sugar

1 C Cake Flour

¼ t salt

WET mixture:

12 large egg whites, room temp

1 t cream of tartar

1 C granulated sugar

2 t pure vanilla extract


Other Stuff:

Hand Held/ Stand mixer with beater/whisk attachment

Fine mesh sieve

Large bowl for measuring

Large, wide bowl for mixing.

Removable bottom 10" flute pan 

Vinegar or lemon juice for cleaning bowl

“safety bowl” for separating eggs


Instructions:

Separate eggs and make sure they are to room temperature before beginning your other prep. Preheat oven to 350 Deg F with one wrack positioned directly in the center of the oven. 

In a bowl, measure out the cake flour and sift with ½ C sugar and salt thrice. I like to use my other large mixing bowl to alternate finishing so that the wide bowl is empty. After the final time, whisk just to be sure they are well combined.  Set this Dry mixture aside.

In your stand mixer put all of the egg whites in and beat for about 30 seconds to break them up. Add in your cream of tartar and beat for about 2-3 minutes until you can see whisk streaks in the mixture (soft peaks). Then gradually add the 1 C of granulated sugar about a tablespoon at a time to ensure that the sugar dissolves between each addition. Once all of the sugar is in, beat until you have stiff peaks (about another 2-3 minutes).  Check just to be sure that the sugar is dissolved by rubbing a bit between your fingers. If not yet dissolved, whisk for a little while longer.

Transfer the meringue to the wide bowl and in three additions, fold in the dry ingredient mixture. “Down the middle and around the outside” between each addition of the dry ingredients. Be sure to turn bowl as you go and go all the way under once or twice to ensure no dry pockets are left unincorporated.

Transfer to UNGREASED fluted pan in “dollops.” Then with an offset spatula or butter knife, zig zag through the batter to decrease air pockets.

Bake the cake for 30-40 minutes (mine took 38). Do not open oven for first 30 minutes.

The cake is done when a toothpick inserted at the halfway point between the flute and the rim comes out clean. Invert the cake on the feet of the pan or with a bottle in the center of the fluteto cool for 1 ½ -2 hours.

Unmold by running a butter knife or a flat skinny spatula along the edges and flute. Pop out the flute and then run the knife between the cake and the bottom of the pan to remove.

The cake will keep about 2-3 days (if it lasts that long) at room temp in airtight container or wrapped in plastic wrap. Though it can stand alone, served with whipped cream and freshly macerated fruit, it’s amazing!

Enjoy this Heavenly Angel Food Cake! 

Comment

Cake Pops!

Comment

Cake Pops!

Have you ever been walking through a coffee shop and see “Cake Pops” in the display case? Follow this recipe, and I’ll show you how to make these DELICIOUS cake pops at home! These are a super great treat for a birthday party for kids! They aren’t very big and don’t require a LOT of cleanup either. . .


Ingredients:

1  9-inch vanilla cake layer ( I use Martha Stewart’s Vanilla cake

c. 1 ½ C of my Brown Sugar Buttercream (1 stick butter's worth) 

6- 8 oz. semi-sweet candy coating chocolate, melted

½-1 t. vegetable shortening


Other Stuff:

Popsicle sticks (I use 6 in.)

Heated pot for melting candy, I have This one

Large bowl

1 T kitchenspoon

Ungreased cookie sheet

Silpat or parchment

Oasis Foam

Tape

Wrapping Paper


Instructions:

Line an ungreased baking sheet with parchment/silpat.

The order of operations is malleable for sure, BUT if you’re baking the cake the day of this project, be sure that it has time to cool completely before using.  You will have to have part of the chocolate melted to help put the pops together, so I start with chopping and melting about ½ of my chocolate. Meanwhile, you can make the Brown Sugar Buttercream (only about 10 minutes) and break up the cake. Once the cake is broken in to crumbs, you can start to incorporate the buttercream a little at a time. It’s important not to add it all at once, as you may not need it ALL depending on your cake.

Once your cake is incorporated and you have a dough that holds together with what appears as “layers” when some is broken off, you’re ready to form the cake balls. I use a large kitchen spoon (c. 1-1 1/2 T) to break off a bit of the dough; then between cupped palms of my hands, I roll each ball out into as smooth a ball as possible. Take one of the popsicle sticks, dip in the melted chocolate, and put into the bake ball. Place this stick side up on your parchment lined baking sheet. I can get 7 rows of 5 on my sheet. Place your pan into the fridge for about 30 minutes to chill.

While you’re chilling the dough balls, you can work on chopping the rest of the chocolate and thinning it with shortening; you want it to be runny as to help form a smooth layer on the cake balls. Also, you can now prepare your oasis by taping 3 standard blocks together and then wrapping like a present. I had to pre “puncture” my holes just because of the tape. . .

Once your dough is chilled, you can begin dipping the pops! Tip the reservoir and submerge a pop far enough for the melted chocolate to cover all of the dough (my benchmark is if it’s touching the chocolate just around the stick). THEN, pinch the stick with two fingers almost in the chocolate reservoir, with your other hand on the farthest end of the stick from the reservoir, spin back and forth as to get the excess chocolate off of the ball. Invert the stick with the ball up and stick it in your wrapped foam. Let these stand at room temp for about 5 minutes after the last one is finished and then refrigerate for about 30 minutes before a final storage of lying them flat in an airtight container.

IF you want to decorate with a different flavor/color of chocolate with swirls or flowers, they will need to chill again before that time. You will have some that crack. I found that the shortening does help with this response of the temperature change . . .

And in just a couple hours, you have delicious cake pops better than the coffee shop version! Enjoy! 


Comment

Tart Crust

Comment

Tart Crust

Have you ever been walking through a pastry shop and for sale is this gorgeous tart with ridges up the side that looks not quite like your average pie? It’s a delicate flaky crust that’s not that hard to make! Here’s how you make this wonderful Pâte Sucrée pastry shell!


Ingredients:

DRY:

10 oz (c. 2 cups not leveled/not heaping) All Purpose Flour

1 oz (c. 1/4 cup) Confectioner's sugar

8 oz Butter (2 sticks-- cold and cubed)

WET:

1 large egg yolk

2 T COLD water 


Other Stuff:

11 inch removable bottom tart pan

rolling pin

large bowl

cling film

baking beans/rice


In a Large bowl, sift and whisk together the flour and confectioner’s sugar

Rub butter into the dry mixture with fingers until the mixture looks like wet sand.

Beat the egg yolk and water together until all “lumps” of yolk are broken, then make a well in the center of the dry mixture and add wet mixture. Incorporate quickly just until it sticks together.

Flatten dough into a disk or a ball, wrap with cling film and refrigerate for a minimum of 30 minutes, up to 2 hours.  

If dough has chilled longer than than 45 minutes, it will need to sit at room temp for about 3-4 minutes before rolling. Liberally dust a surface with flour and dust your rolling pin as much as possible. Remove disk from fridge and then "wake up the dough.” For the traditional tart, it needs to remain 1/8-1/4 inch thick then rolling back on the pin lift the dough and place over the 11" tart pan then pressing into the form.  Chill for at least  10 minutes in the refrigerator.

During this final chill is when I like to preheat my oven to 375Deg F.

Just before baking, place a two pieces of cling film in the bottom and into the corners edges of the tart shell as much as possible. Make sure to gather all of the cling film to the center over the baking beans (as to not tough any metal) and "blind" bake for 20 minutes, remove your film filled with beads and bake to brown the bottom (about 5 more minutes).

Let cool 15 minutes in pan on a wire wrack before removing. Let cool completely before filling with beautiful pastry cream or whipped cream and fruit. 

Comment

Brown Sugar Buttercream

Comment

Brown Sugar Buttercream

We’ve all known about brown sugar for a while, but have you ever considered applying it to a buttercream before? This is like adding a spice cake to your buttercream repertoire! This is a ratio sort of recipe. I’ve multiplied this by 2 or three depending on need. For a batch of 36 cake pops, this amount goes will with a 9-inch cake!  For Pineapple Up-side-down macarons, you'll only need about half this much. . . Here’s HOW:

Ingredients:

1/2C (1 stick) of butter (salted is what I prefer), room temp

¼ C of dark or light brown sugar, packed, sifted

1 t vanilla extract

* ½ t ground cinnamon

2 C confectioner’s sugar, sifted

* 1-2 T milk

*optional

Other stuff:

Handheld mixer with beaters or stand mixer with paddle attachment

Sifter

Instructions:

Bring your butter to room temperature; it needs to be soft enough to hold an indent when pressed. Break up the butter with the beaters/paddle just a bit so that it’s no longer a stick and then in the bowl. Sift the brown sugar discarding any that may have clumped up. Blend in the brown sugar for 3-4 minutes so that some of the sugar crystals have the opportunity to dissolve in the liquid from the butter. It will remain a little “grainy,” but the flavor, is AMAZING!

Here's a piped version of this buttercream in a French Macaron

Here's a piped version of this buttercream in a French Macaron

After you’ve blended the butter and brown sugar, it’s time to add the vanilla and cinnamon. If you have an allergy to cinnamon, you can totally leave it out. I like to mix these in for a minute or so and then wipe down my beater and my bowl. Now, in the bowl, sift in the confectioner’s sugar. Beat slowly at first until incorporated and then turn the speed up until fully combined and the butter cream is fluffy and smooth (about 2 minutes). Depending on how you’re to apply this buttercream (or eat it out of the bowl), you won’t need any milk! When I use it in macarons or cake pops, I don’t use any milk, because I like it to be a bit more stiff; however, once using it to fill a naked cake, I needed it to be a more “spreadable” consistency, so 1 T milk/stick of butter is what I ended up adding. . . 

That’s all you need for a simple brown sugar American Buttercream! 

Comment

Pineapple Fruit CURD!

Comment

Pineapple Fruit CURD!

Pineapple Fruit Curd

When one hears the word “curd,” it’s a little like “curds and whey” that little Miss Muffet was eating. . . There are two types of curds: Those derived from a dairy’s separation and a “fruit curd” that’s made with a citrus fruit’s juice, eggs, sugar, and butter (SUPER Simple!). Here’s how I make a simple pineapple curd that will keep you satisfied for days!


Ingredients:

4 Grade A Large egg yolks

½ C granulated sugar

*½ C (scant) canned pineapple juice, shaken  

4T UNSALTED butter, cubed and room temp

*1/8 t salt, if using fresh juice, but taste before you put this in. . .


*I’ve used canned juice, and it works beautifully.  If you would like to use fresh juice, puree cubed pineapple slices in a blender and, through cheesecloth, strain the pulp from the juice. . .


Other things you’ll need:

Heavy bottomed pot

Heat safe bowl, ideally with larger diameter than the heavy bottomed pot

Whisk OR hand held mixer with beaters

Wooden/Silicone heat-safe spatula

Fine mesh strainer


Instructions:

In the bottom of your heavy bottomed pot, bring about an inch of water to a simmer over medium heat. Make sure that this water will not touch your heatproof bowl once it’s been placed over top. At this point, I like to cube my UNSALTED butter so that it comes to room temp easily while the curd is cooking.

In your heatproof stainless steel/glass bowl whisk together the egg yolks and sugar until smooth paste forms. (If you’re using a handheld mixer, you can use it to beat this together) A little at a time, whisk in the pineapple juice to form the liquid mixture.


Place this bowl over the simmering water and whisk or beat with handheld for about 6-7 minutes on low speed. At this point, you can switch to a spoon and just stir. You want to be sure to keep the mixture moving as to not cook bits of the eggs. Stir for about 3 more minutes. The mixture is cooked when the paste formed coats the back of your spoon, and with a finger run through the middle, it stays separated. IF you have an instant read thermometer, you want to make sure that the liquid has reached at least 160degF to prevent any food-borne illness.


After your liquid has cooked for about 10 minutes total (may take longer if it’s a really humid day) and reached the consistency of a thick yogurt, pull it from the heat and incorporate the UNSALTED butter a little at a time making sure to melt each cube before the next is put in. (I generally never use unsalted butter, but for this application, it’s a MUST! Especially, if you’re using the canned pineapple.) After all of the butter has melted into the mixture, you can now run the fruit curd through a fine mesh strainer to catch any little bits of eggs that may have cooked. Once in the cooling bowl, cover with cling film that touches the curd; this will prevent a “skin” from developing. Chill for about 2 hours in the refrigerator before using. The liquid will firm up the cooler that it gets.

Our Pineapple curd is directly under the cherries in these DELICIOUS macarons! 

Our Pineapple curd is directly under the cherries in these DELICIOUS macarons! 


That’s all you need for a delicious treat of Pineapple curd! 

***Below is a demonstration of a Lemon curd. . . the process is the same, but the ingredients are a bit different. . . Check it out! ***

Comment